Jump to content
Do Not Sell My Personal Information


  • Join Toyota Owners Club

    Join Europe's Largest Toyota Community! It's FREE!


Just Bought 07 Auris Tr, Need Some Tips On Mod


Kocopopz
 Share

Recommended Posts

Just a set of chromed door handles with built-in LEDs. I think they are supposed to be blue constantly and blink yellow when you put turn signal on. But by connecting them in a different way there are other combinations aswell. You can make them light up blue or yellow when you open the doors etc.

door-handle-led-light-turn-signal-mazda-3-5-6-cx-7-2042.jpg

Looks cheap if you ask me. Probably cause unwanted attention with the blue light aswell.

Link to comment
Share on other sites


  • Replies 121
  • Created
  • Last Reply

Top Posters In This Topic

  • Speed_Chaser

    37

  • Kocopopz

    32

  • 27901591

    14

  • tavy

    12

Top Posters In This Topic

Posted Images

And that's exactly why I'm not going to order them myself. Not stealth enough for me... But each to their own, so I wanted to share my knowledge in case someone will get excited :)

Link to comment
Share on other sites

So, here comes the guide!

Remove the glove box:

remove.jpg

This is the plug you should connect your wires to:

cluster.jpg

There's two wires that are connected to the dome lights. If you want footwells to work as you open the door, connect like shown in the picture:

closeup-1.jpg

If you want the footwells to light up as you turn on your parkers/headlights using stalk switch, locate the glove box light (lights up as you turn on your lights so should be easy to find). Disconnect the connector (pretty tight squeeze, but can be done) and connect your footwell wires to the connector wires. Connect back and test. No pics for this one, but should be easy to locate and connect :)

Good luck and post back if you've got questions!

I'm wondering why you have to add the extra wire in? Isn't the positive already going to the interior dome light? Cant you tap into that?

Link to comment
Share on other sites

No need to add anything, those wires are there from stock. You just tap into them. Much easier to do it there than on the roof...

Link to comment
Share on other sites


Well, then you can always do some easy testing. First chech the wires you have. You can find + and - by connecting your LED strip to the wires and see if it lights up or not. Try different combinations and remember to try and change the polarity aswell. Voltmeter will do too.

If you will find out that one of your existing wires is positive and another is negative, just tap into them. But you can also use the free holes if you will find out that they will light up your LED strip the way you want. Then you can just push your wires into those holes and secure with some tape etc.

Link to comment
Share on other sites

  • 2 weeks later...

Has anyone put another boot light the other side of the original one? If so where did you get it from and how did you go about installing it? Sure i seen some pics somewhere but cant seem to find them now

Link to comment
Share on other sites

Yep, it was our german friend northi! :) It's all here. I remember that he told how he managed to install that light on the other side, but cannot find it anywhere now. It doesn't seem to be in that post, only the pics...

Link to comment
Share on other sites

Yep, it was our german friend northi! :) It's all here. I remember that he told how he managed to install that light on the other side, but cannot find it anywhere now. It doesn't seem to be in that post, only the pics...

aha iv sent him pm thanks

Link to comment
Share on other sites

Please post back as soon as you'll get an answer. I'm curious to know too, but cannot find that post where he explained the whole thing... I remember that he told something about RHD and LHD differences, or then he just cut the hole on the other side and bought the extra lens :g:

Link to comment
Share on other sites

i bought the original boot light cover from toyota and cutted a hole in the trunkcoverplastic. i put the bootlight cover in with glue and take the original cable and made it longer and put it also to the right side.

there is no secret.only simple things.but you need a calm hand by doing the hole in the plastic ;-)

Link to comment
Share on other sites

the price was under 20€ for the boot light cover,where you can also put a lamp in. i cut all away and put a individual led in.

Link to comment
Share on other sites

Thanks for the info northi :) Could you tell us which tools did you use to cut the hole? I am probably going to copy you a little next summer, because my LED strips don't look stealth enough...

Link to comment
Share on other sites


i put a machine which is normally used by a dental technician, you can put in some rotating/cutting disc,drill and burrs.

Link to comment
Share on other sites

Ok cheers! I'm not a dentist but I'm sure I will find some good alternative :D

Link to comment
Share on other sites

Use a dremel. U attach disc to it. Got sanding bits with it too. Very useful tool. Must it be stuck in or is that because your home didn't go to plan?

Link to comment
Share on other sites

hey people

Does anyone know how i can replace the fuse for the cig lighter?

pictures and instructions would be most greatful !

Thanks

Link to comment
Share on other sites

Hi mate! You should check the user's manual, it's all there with illustrations :)

Link to comment
Share on other sites

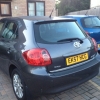
ok so i put a front view camera in today, my god its sooo much effort getting the wire threw the firewall, all was good until i decided to power up the rear view camera, via the same power supply as the front, then the fuse decided to blow so im going to power it from the main Battery with a toggle switch to turn off the power when i leave the car. the front camera is actually for rear view but seen tho as it was spare i thought i'd just stick it on for fun, now the problem is that because its a rear view camera its displaying everything inverted, look at the blue van on the actual pic, its on the right, now look at it from the screen its on the left.

will show pics of rear view camera when i get it to work although all the wiring and actual camera is fixed in and ready.

next mini project is putting the door handle lights in, which i soldered up today and messed about with. got them to work with the interior light when door is opened.

sorry about the essay ^^^^^^

post-126181-0-17943100-1360701287_thumb.

post-126181-0-54767500-1360701305_thumb.

post-126181-0-41559700-1360701324_thumb.

Link to comment
Share on other sites

Good job, very nice!

How did you manage to get the wires through the firewall? It's very obstructed by the panels inside and engine parts on the other... :(

Link to comment
Share on other sites

That was by far the hardest part of wiring everything, I used a thick wire like a metal coat hanger which I forced through the rubber grommet, then attached the wiring to one side of the hanger and pulled it back out. I had to cut and re-solder the RCA cable as the plug wouldn't go through.

Link to comment
Share on other sites

Ok, so basically the same thing as I did when routing my door handle lights into the doors through those rubber tunnels.

Link to comment
Share on other sites

two quick questions, what happens if you dont ground a wire, i didnt ground the wire for the wireless camera reciever and when turned on it started smoking, absolutely **** my self lol, could it be that or is it something else???

and any pictures or guide as to how to remove the doot panels?? cant seem to find any screws which hold the panels.

post-126181-0-26574000-1360785653_thumb.

Link to comment
Share on other sites

Sounds like you made some wrong connection and caused a short cut. Maybe both wires were connected to the positive feed?

If you don't connect the ground wire the equipment will not work, as it needs both, positive and negative feed.

To remove the door panels you need to open the handle covers. One of them is silver on top of the big handle, just stick something sharp in between and it will pop off. Other one is behind the silver handle which you pull to open the door. That one is black plate, should pop off in the same way.

There are 3 screws in total. Two of them behind the silver cover and one behind the black cover. Undo them and pull the panel. It will come off with some force as there are many clips which are used for attachment.

Link to comment
Share on other sites

Latest Deals

Toyota Official Store for genuine Toyota parts & accessories

Disclaimer: As the club is an eBay Partner, The club may be compensated if you make a purchase via eBay links

Join the conversation

You can post now and register later. If you have an account, sign in now to post with your account.

Guest
Reply to this topic...

×   Pasted as rich text.   Paste as plain text instead

  Only 75 emoji are allowed.

×   Your link has been automatically embedded.   Display as a link instead

×   Your previous content has been restored.   Clear editor

×   You cannot paste images directly. Upload or insert images from URL.

 Share


×
×
  • Create New...


Forums


News


Membership


  • Insurance
  • Support